Well, kids... we did it. It's DONE. I couldn't be any more excited about the way it turned out!!! Sorry I haven't posted in so long, the whole planning a wedding thing kind of took over my life once the dress as done. I have LOTS to tell you!!! Where should I start?? Maybe about where I left off last time....let's see.... wow, last time I posted we had just gotten the hoop skirt in! We added a little tulle to help the shape maintain itself.

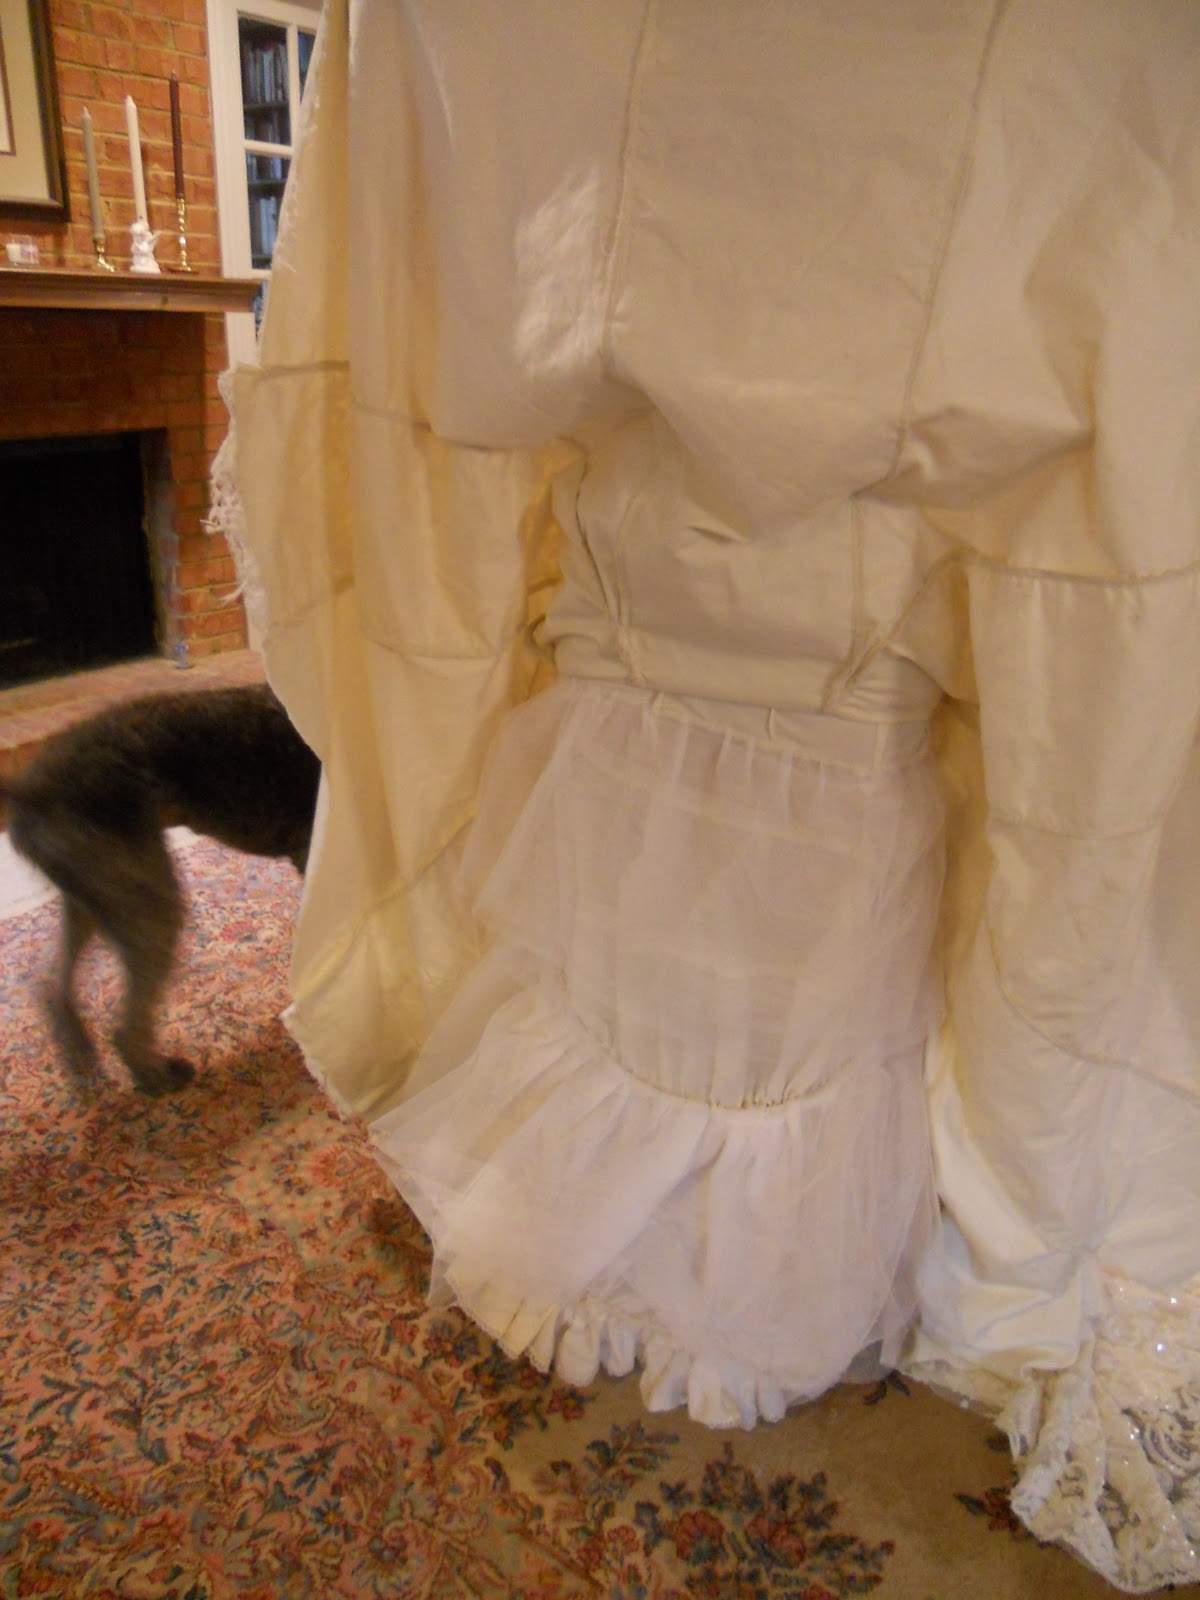
Since we got the hoop skirt set in, a lot has changed! Once I was able to put it on and the fullness on the bottom was right I really started to feel like a bride. I quickly got over that and started picking everything apart. I was looking at the way the skirt was falling, which I didn't love, and how the train was flopping all over the place as I walked around and thought, "You know, it would be great if there were some way for us to weigh down the hem". Then I remembered reading somewhere (probably for History of Costume class) that Chanel used chains at the hems of some jackets and blouses to weigh down the fabric and manipulate the way fabric hangs on a body. I bet you didn't know the chain on those signature tweed jackets wasn't originally intended as a decorative trim! As I was thinking about this my mind instantly went to the years of dancing on the stage at the Davis Theater in Montgomery and getting wrapped up in that deep burgundy curtain that has sand bags in the bottom. The weight of the small sandbags made such a difference in the way that the curtain fell, so I started thinking of ways to incorporate a Davis Theater situation in the dress.
Sand would be really messy and a huge pain, and fabric weights are basically metal discs which wouldn't work because I need an evenly distributed weight. I decided that we should try chain. I went all over town looking for the right thing. I looked at Michael's and JoAnn's, but all they had was chain for jewelry-making, which was too light and really pricey. I remembered that Lowe's has chain and figured it wouldn't hurt to check it out. I spent some time in the aisles swinging around different sizes of chain and getting strange looks from burly men. I settled on a medium-sized chain and got 30 feet of it. I'm sure this chain has all kinds of intended purposes, the least of which is wedding dress weight, but as Tim Gunn says, "You just gotta make it work." When I got it home we pinned some of it to the hem and were amazed by the difference! It just make the whole dress hang beautifully.
 |
| Before Chain |
 |
| After Chain- What a difference!! |
Then Mom and I spent about a week mulling over how exactly we should execute this. During this time I was getting a lot of phone calls and emails from Mom that began with something like, "I was thinking in the shower this morning.....and you know that's where I do my best thinking...." or "I was laying in bed last night worrying about the chain...you know I just can't sleep when there's a problem like this..." Then there were several arguments about whether the chain should go IN the hem or be applied on TOP of the hem. I eventually conceded and we came to an agreement. We would encase the chain (to reduce the ghost of Christmas past sound effects as I walk down the aisle) and then run that through the hem so that it's inside of the hem.
 |
| Sandy using wire cutters on the chain! |
 |
You may use this chain for hanging plants,
I use it for my wedding dress |
Once we got it done Sandy let out a sigh of relief and we gawked over what a difference it made. Then she told me for the 1000th time about how Joy Stanford told her that Coco Chanel was the one who came up with this idea. Debbie Cotten once said so wisely, "Just smile and nod. Smile and nod." So I did. The only thing left to do was the eyelash trim on the hem! I ordered some more and once it came we got down to business. That went quickly. Then it was DONE!!! Pretty exciting!!!
 |
| The eyelash really completes the look! |
 |
| With the chain, before the eyelash |
We spent a couple of weeks just enjoying the fact that the dress was done. Done. We did it. It was so surreal. But really it wasn't quiiiite done. I had to take care of the bustle. I looked up several different options and watched a lot of youtube videos. I decided that Lori with the awesome hair (
http://www.youtube.com/watch?v=v352_kO9k2s&noredirect=1) had the right idea. I could use loops and buttons, but Lori likes the idea of using a few different colored ribbons on the inside of the skirt so that the bustle can be tied up, and is pretty fool-proof. This works best for me because the lace and silk aren't attached at the train, and the skirt is pretty heavy so I would worry about the button/loop combo falling off or tearing. I had to use three bustle points underneath the skirt on the silk to get it all off the ground and three more points under the lace. Thank goodness they're color coded because that could be confusing! I'm pretty ecstatic about the way it turned out. It looks very late19th/ early 20th century bustle. Like 1880s-1910s, "Gibson Gown" kind of a thing.


Amazing
ReplyDelete